

Bleed Explained
A print guillotine is a high-quality paper cutter that can quickly and precisely rip through hundreds of sheets of paper. We employ two different types of blades: high speed steel and tungsten steel, both of which are routinely sharpened.
However, as the paper is sliced and the edges are pushed away from the blade, there may be very slight movement. You must add a little amount of overprint, sometimes known as “bleed,” around the borders of your artwork in order to avoid any white spots showing up on the corners of your print.
However, as the paper is sliced and the edges are pushed away from the blade, there may be very slight movement. You must add a little amount of overprint, sometimes known as “bleed,” around the borders of your artwork in order to avoid any white spots showing up on the corners of your print.
How much bleed do I need?
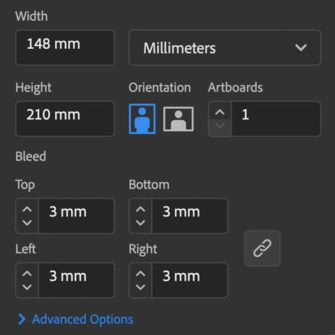
We recommend adding 3 mm all the way around your paper; any images or background colours or patterns must extend past this point.
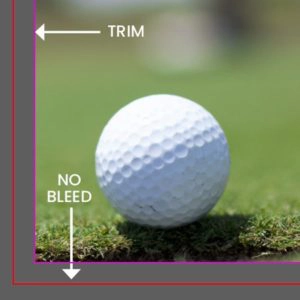
Document set up with no bleed
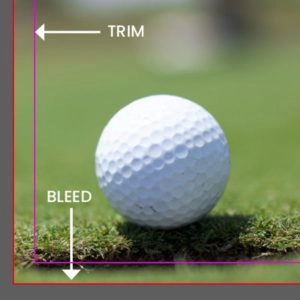
Document set up with 3mm bleed
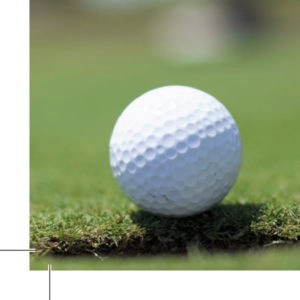
PDF with bleed and crops
How do I add bleed to my document?
Indesign
Under File > Document set up in the dialog box that says bleed and slug click into the bleed part and add 3mm on each side.
Illustrator
Similar to indesign except File > New will bring up the document dialog box, add 3mm to all sides.
Photoshop
Photoshop does not have a bleed setting so we recommend setting up your document 3mm bigger all around, so if document is to be printed A4 (210x297mm) set up as 216 x 303mm.
Under File > Document set up in the dialog box that says bleed and slug click into the bleed part and add 3mm on each side.
Illustrator
Similar to indesign except File > New will bring up the document dialog box, add 3mm to all sides.
Photoshop
Photoshop does not have a bleed setting so we recommend setting up your document 3mm bigger all around, so if document is to be printed A4 (210x297mm) set up as 216 x 303mm.
Safe Area
Working with a safe area, also known as a “margin,” will keep your artwork looking neat and aesthetically pleasing. This area, which is not to be confused with bleed, sits within the artwork and is typically used for text and headings or important information on top of your background area. Your type layout may look fine on screen if it is a few millimetres in from the edge, but it will appear cramped and uneven when it is printed onto its chosen material.
For smaller print, we advise a margin of at least 5mm; for bigger printed goods, such banners, we advise a margin of up to 25 mm. For more information, please get in touch below.
For smaller print, we advise a margin of at least 5mm; for bigger printed goods, such banners, we advise a margin of up to 25 mm. For more information, please get in touch below.