

Embossing and Debossing
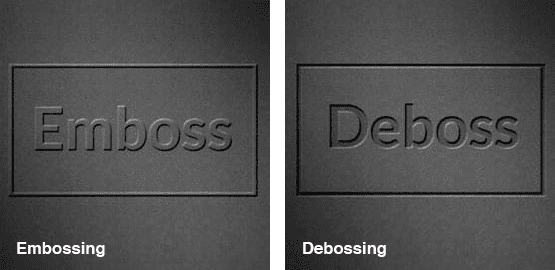
In order to produce a raised form or picture, embossing is applied to certain paper sections. When compared to the flatness of the remainder of the sheet, the embossed region takes on a three-dimensional appearance and creates a tactile and visual contrast.
When a high-end, custom look is sought, embossing is frequently utilised. Examples include wedding stationery, letterheads, folders, certificates, packaging, etc. Additionally, it serves as a security tool to stop counterfeiting.
When a high-end, custom look is sought, embossing is frequently utilised. Examples include wedding stationery, letterheads, folders, certificates, packaging, etc. Additionally, it serves as a security tool to stop counterfeiting.
How is Embossing Applied
The paper is sandwiched between two copper or magnesium dies. The raised design will be on the die that is positioned beneath the paper, and the recessed pattern will be on the counter die that is positioned on top of the paper. The paper is then forced into the recessed die by applying heat and pressure to the two dies, which causes the paper fibres to be compressed and creates the permanently embossed region.
Types of Embossing
There are several embossing techniques available, each offering a different level of detail, contrast, and finish depending on the desired effect and application.
Blind Embossing
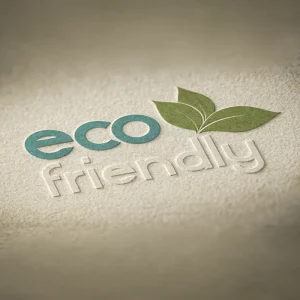
The term “blind embossing” refers to a raised region that is not printed. Without the use of any ink or foil, this offers a pronounced yet subtle contrast and can handle relatively minute detail.
Registered Embossing
This occurs when print, foil, or spot UV varnish are also utilised in conjunction with embossing (or a combination of more than one of these). To provide even greater contrast, a second embossed section might be employed.
Combination Embossing
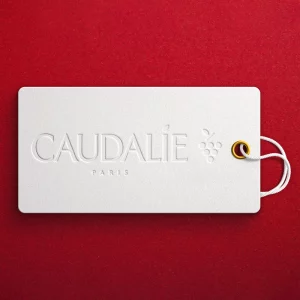
The embossing is aligned to the picture such that the printed image is stamped out after it has been printed, foiled, or put in spot UV. Text and basic graphics are best suited for this technique.
Debossing
Similar to embossing, but with the metal dies switched around such that the region is stamped into the paper and creates a recessed (dented) area, is the process of debossing. Similar to embossing, you can fill the area with ink or foiling or leave it plain and unprinted to only create the debossed look.
Things to Consider Before You Start
Similar to embossing, but with the metal dies switched around such that the region is stamped into the paper and creates a recessed (dented) area, is the process of debossing. Similar to embossing, you can fill the area with ink or foiling or leave it plain and unprinted to only create the debossed look.
Artwork
The ideal files for this technique are vector ones since they can easily be scaled up or down without losing quality.
Keep it simple: Since the embossing is the main attraction, stay away from shading and, if feasible, stick to one colour so that it doesn’t get lost in the print. This is especially suggested if you plan to emboss your materials in combination.
Keep it simple: Since the embossing is the main attraction, stay away from shading and, if feasible, stick to one colour so that it doesn’t get lost in the print. This is especially suggested if you plan to emboss your materials in combination.
Choosing The Embossed Area
Less is often more. The right approach depends on the specific item and the effect you want to achieve. For example, you may choose an all-over embossed or debossed pattern on an invitation or printed card, with a registered or combination embossed area to create contrast against the background design.
The impact of embossing is usually strongest when it is used selectively, allowing key elements to stand out and create a more refined finish.
The impact of embossing is usually strongest when it is used selectively, allowing key elements to stand out and create a more refined finish.
Choosing The Pattern and Paper Weight
Think on how deep your embossing is. Small portions shouldn’t be embossed deeply since doing so will cause the paper torn. If using multiple layers of embossing, place the deeper levels in the less detailed parts to minimise paper damage.
If deep embossing is to be utilised, a high paper weight is advised since your paper must be thick enough to support the depth without being compromised. A thick weight paper with a deep emboss will produce an image with depth and detail.
If deep embossing is to be utilised, a high paper weight is advised since your paper must be thick enough to support the depth without being compromised. A thick weight paper with a deep emboss will produce an image with depth and detail.
Consider The Reverse
There will unavoidably be a raised or recessed region on the opposite side of the sheet since the embossing or debossing process moves the paper to the opposite side of the sheet.
Digital Die Cut Paper and Card
Advances in technology now make it possible to achieve high-quality “die-free” cutting across a wide range of paper and board weights, making it a practical option for custom printed products. By removing the need for a physical die block, this process helps reduce both production costs and turnaround times.
While digital die cutting is not intended for the same high volumes as traditional die cutting, it is an ideal solution for shorter runs, one-off designs, or prototypes created ahead of larger production runs using conventional die-cutting formes.
If you are unsure which cutting method is right for your project, contact our team and we will be happy to advise on the most suitable option for your requirements.
While digital die cutting is not intended for the same high volumes as traditional die cutting, it is an ideal solution for shorter runs, one-off designs, or prototypes created ahead of larger production runs using conventional die-cutting formes.
If you are unsure which cutting method is right for your project, contact our team and we will be happy to advise on the most suitable option for your requirements.